Saturday, July 31, 2010

Summer Vegetable Pasta (a.k.a. what the heck do I do with all this squash??)

SQUASH
The thought of it used to strike fear in my heart. 

Fear and disgust. 
I hated squash. 
Me. 
Strange, I know. That the eater of all things vegetable refused to even try this stuff until I was in high school. 

The Hungry Hubby still turns his nose up at it. (Unless my Mom makes it for him, then he'll gobble it up. Whatever.)
Well, this time of year anyone with a garden can tell you they end up with more d*mn squash than you can shake a stick at.

That's how we ended up with all this squash. 
It was a gift. 

Sortof.
At Church on Sunday someone had left a large pile of vegetables on a table with a sign that said "Homegrown veggies, please help yourself." The sign might have well have said "We're over run with this yellow squash. It's like Kudzu. We don't even know what happened to the swingset. It's everywhere."
If you had SEEN the pile of squash on that table, you would totally understand the desperation behind that neat handwriting.

It was like this. {via}


I should have taken a picture.
Instead, I took 3 GIANT yellow squash home, knowing I would be the only eating them.

So then I had this squash. 
I just stared at it for a week. 

This morning I took the Hungry Baby to the Pepper Place Farmer's Market and got some MORE veggies. 

right. 

So I made Summer Vegetable Pasta. 

pretty sexy for a camera phone!


It's awesome! (AND because odds are The Hungry Hubby won't try it, due to the squash and it being remotely healthy for you I get it all to myself!) 

For Summer Vegetable Pasta, you will need: 

  • 1 lb. Penne (I used gluten free brown rice pasta)
  • Olive oil
  • Sea Salt
  • 3-4 Yellow Summer Squashes, mercilessly cut up into little bits
  • 1 pint grape tomatoes, cut into halves
  • 1 1/2 tablespoons dried basil (you could use about 1 1/2 cups fresh leaves, cut up, but I didn't have any on hand)
  • 2 tablespoons balsamic vinegar
  • 2 tablespoons minced garlic
  • 1 teaspoon crushed red pepper flakes
1. Put the little squash bits in a colander, toss them with about a bit of sea salt and put the colander over a big bowl to drain for about 30 minutes or so. (This will allow some of the water to leech out of the squash, so it won't be so...well...squashy.)

2. Put a big pot of well-salted water on a boil.

3. After some water has drained out of the squash, pat it with a paper towel, just to get it a bit drier. 

4. Put the squash in a large pan with a few tablespoons of Olive Oil, over medium-high heat. Toss the squash around. 

5. While the squash is a-squashin', put the pasta in. (Don't let it cook past "al dente", or it will be gross.)

6. Once the squash has been cooked up a bit (it will appear slightly softer), put in the basil, pepper flakes, garlic and balsamic. Coat evenly.

7. Once pasta is ready, drain it (don't rinse it) and return to the big pot.

8. Add the tomatoes to the squash and heat through. 

9. Mix the vegetables into the pasta, making sure the olive oil coats the pasta well. 

10. Serve warm (with some grated parm and white wine if you're trying to look fancy!) 

Feel better about yourself for figuring out what to use the squash for without coating it completely with Velveeta.


Thursday, July 29, 2010

R.T.'s Italian Chicken (a.k.a. one of the easiest things you will ever make)

My cousin, Rebecca Tabb, is an amazing human being who has mastered the art of thinking of her CrockPot as useful for making more than just roast. 

(Gee, I haven't made roast in a while ... [insert Homer Simpson saying "mmmmm...roast"] but I digress)

She came up with this great idea for Italian Chicken and it is Hungry Hubby approved! 

I even made it yesterday.
That's right people. I USED MY CROCKPOT FOR MORE THAN JUST ROAST. 

This is all the cooking skill you need.


For Italian Chicken you will need: 

  • 6-8 Frozen, boneless, skinless, chicken breasts (or if you're like me, those bone-in, skin-on, chicken leg quarters you got in a bag for $2.50 at Aldi. Because you're cheap and couldn't find it in your cold, dead heart to spring for breast meat.)
  • 1 bottle of cheap Italian dressing
That's it. 

Seriously, that's all you need. 

1. Throw the frozen chicken into the CrockPot

2. Squirt the ENTIRE bottle of dressing on top of the chicken. 

3. Set the CrockPot for 8-10 hours on low.

4. WALK AWAY. 

(If you're really ambitious, throw some skinned baking potatoes in the CrockPot too. I did. They were GOOD. But, you don't have to...)

(While it was cooking, we went to Publix, and took the Hungry Baby to see "Inception"! It was like a date!)

Even with the cheapo chicken, it turned out SOOOOOOOO GOOD! 

Thanks to Rebecca we have a new favorite in our house and I have new confidence in my CrockPot skills!

Chocolate Cobbler (a.k.a. OMG LookAtThisGoopButItIsNOMS! Pie)

This is A-M-A-Z-I-N-G. 

It's like a chocolate lava thing, but when I first read about how you make it, I didn't think it would work. 

I showed it to The Hungry Hubby and blurted "I am going to make this RIGHT NOW and it will never come out looking this yummy but I need chocolate NOW!" 

It was almost 10 pm when I said this.  
The Hungry Hubby, of course, was on board. 
(as you are aware, if it involves sweets and is junky for you, he'll eat it) 


This is GOOD. 

Next time I will be baking a double or TRIPLE batch of this stuff. AND I will be downing it with LOTS of vanilla bean ice cream.

(The Hungry Hubby didn't want to go to the store in the middle of the night just for ice cream. After all, I'm not pregnant anymore. He's not as compelled to cater to my every caloric whim.)
So here goes: 

For Chocolate Cobbler you will need: 

  • 1 cup All-purpose Flour (I used Pamela's Gluten-Free, as always)
  • 2 teaspoons Baking Powder
  • ¼ teaspoons Salt (Morton's regular salt, for once.)
  • 7 Tablespoons Cocoa Powder, Divided
  • 1-¼ cup Sugar, Divided
  • ½ cups Milk
  • ⅓ cups Melted Butter
  • 1-½ teaspoon Vanilla Extract (I used Madagascar Bourbon Vanilla_
  • ½ cups Light Brown Sugar, Packed
  • 1-½ cup Hot Tap Water (and I mean HOOOOT, but not boiling) 
1. Preheat oven to 350 degrees. Shoo cat away from oven.

2. First stir together the flour, baking powder, salt, 3 tablespoons of the cocoa, and 3/4 cup of the white sugar. Reserve the remaining cocoa and sugar. Shoo cat off counter.

3. Stir in the milk, melted butter, and vanilla to the flour mixture. Mix until smooth. Shoo cat away from fridge.

4. Pour the mixture into an ungreased 8-inch baking dish. I used a square casserole dish I had around and was disappointed that it was too big.

5. In a separate small bowl, mix the remaining white sugar (it should be 1/2 cup), the brown sugar, and remaining 4 tablespoons of cocoa. Sprinkle this mixture evenly over the batter. make sure none of the batter is showing. Put cat out on porch.

6. Pour the hot tap water over all. DO NOT STIR! Yes, I know it sounds NUTS, and this was the step I said "THIS WILL NOT WORK!" but, it did.

5. Bake for about 40 minutes or until the top is nice and crusty.

6. Let stand for a few minutes with your husband excitedly hovering over it with a spoon. Eat, then go to bed with happy tummys. 

7. Wake up later and realize cat is still on porch. Let cat in. Go back to bed.

Thursday, June 17, 2010

Cube Steak with Gravy

I have an amazing Mom.
She has really gone above and beyond the call of "Gramy" duty when it has come to helping the Hungry Hubby and I out with our new Hungry Baby.


She cooked; she cleaned (REALLY cleaned); she made sure I showered; and she forced my weepy, exhausted (after 48 hours of natural labor and a we-have-to-get-the-baby-out-NOW emergency situation with forceps) self to take several long naps.

She even made sure that we had food in our fridge. 

Not just "food" but high-quality basic ingredients (and you, dear reader, know how I am about quality). 

Namely, she stocked our freezer with beef.

and not just any beef.

My parents get this AMAZING beef from The Irvington Cattle Company, which is where my parents routinely invest in a side of beef. These guys really know how to raise a yummy cow. Their motto is even "You are what you eat eats."

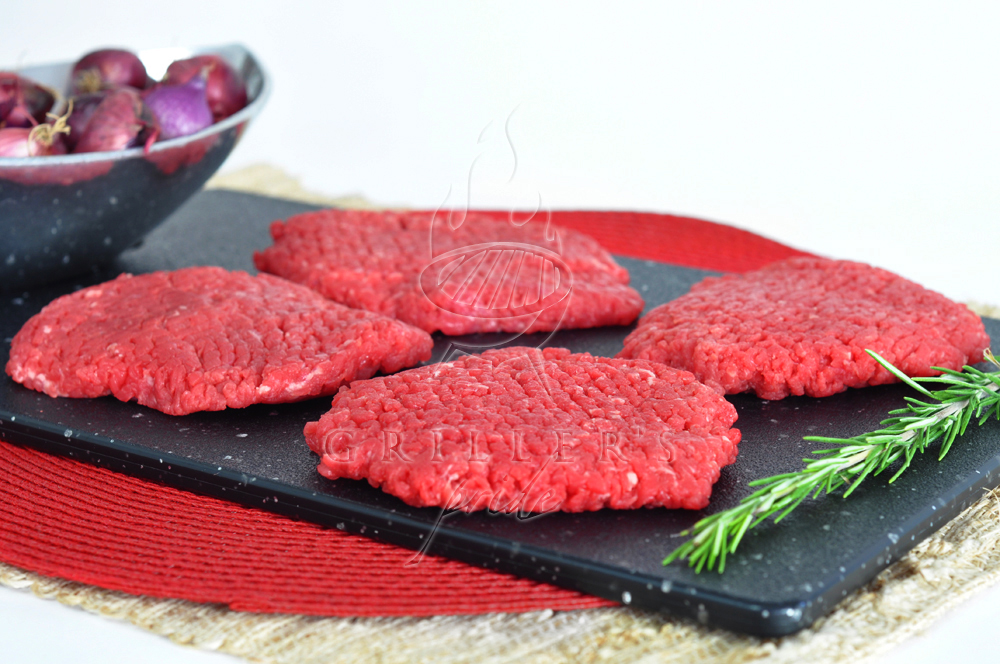
Among the various cuts of meat we were so generously given, I found a couple packages marked "cube steak" - something I was aware of, but unfamiliar with. 
Growing up in the deep south, we never had "cube steak" like my Mom did in Massachusetts, we had "country fried steak" (or "chicken fried steak" as my school cafeteria served, where the beef was battered in corn flakes. The memory of those CFS days still sends shivers down my spine!) 

Needless to say, I was intimidated by the thought of cube steak in my fridge. 
However, not being one to back away from a culinary challenge, I did my research and steeled myself for possible disaster. 

When I announced to The Hungry Hubby my intention to make him cube steak with a white gravy he was so excited he couldn't contain himself. (I should have known. Although he is a bit of a picky eater, my dear husband is a sucker for good 'ole southern cooking.)

and even I liked it! 

For Cube Steak with Gravy, you will need: 
1 package of cube steak (roughly 1-1 1/2 pounds cube steak, or 4 pieces)
1 cup flour (I used Pamela's Gluten Free Baking Mix) plus 1/4 to 1/2 cup flour, separated
1 tsp black pepper
1 tsp Morton's salt
1 cup milk
vegetable oil

1. Pat steak dry with a paper towel (don't "wring it out", just get the extra meat juice off it)

2. Mix 1 cup flour with 1/2 of salt and pepper together in a bowl

3. Coat the bottom of a cast iron skillet with a layer of vegetable oil (not too deep, you want the meat to be able to fry, but you don't want it to submerge in the oil.) Heat the oil to medium high.

3. Coat the cube steak in the flour mixture, making sure both sides are evenly coated. 

4. Once the oil is hot, gently lay the steaks in the oil, allowing the bottom of each steak to brown before you flip it. 

5. Once both sides are equally browned, remove the steaks and let them rest in a heatproof dish; take the oil off the heat. 

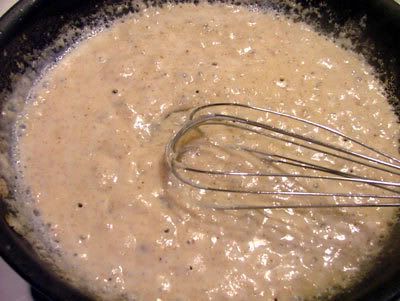
6. Add the remaining flour, pepper, and salt to the oil and all those brown bits in the bottom of the pan. Whisk together, then SLOWLY whisk in the milk. 

as the gravy cools, it will thicken. 

7. Return the steaks to the gravy, coating both sides with gravy. 
Serve with extra gravy poured over. 

The Hungry Hubby has requested this become a regular meal :-)


Wednesday, June 16, 2010

Easy GF Peanut Butter Cookies

These are the easiest "not cut-n-bake" cookies that I know how to make. The Hungry Hubby LOVES to eat these (if I don't eat them all first!)


For one batch of Easy GF Peanut Butter Cookies, you will need:
1 cup creamy Peanut Butter
1 cup granulated sugar
1 tablespoon quality vanilla
1 egg
1. Pre-heat the oven to 315F.

2. Mix all ingredients together.
3. Place 1 inch balls of dough 1-2 inches apart on an ungreased cookie sheet; make cross-hatches on the cookies with tines of a fork. 

4. Bake cookies in preheated oven for 15 minutes; allow to cool before serving.

Red Potato Fries with Herbs de Provence

The Hungry Hubby and I had a few people over for dinner earlier in the week (we should have taken a picture!), which made me more than happy because it meant I had an excuse to make LOTS of different dishes and get honest opinions about them. 
(How do you get honest opinions at a party? If you are unsure if your guests are sincere, ignore their "this is good" comments, take note of how much or how little is left of your dish!)
These fries were GONE and I made a boatload of them! 


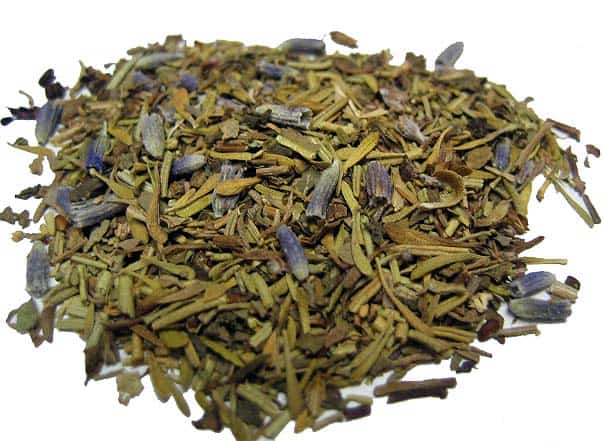
What was the secret? I just bought a new jar of Penzeys' Herbs de Provence mix and coated the hot fries with it. 
See those purple flecks? Those are dried Lavender buds! Yum! The lavender really adds a subtle calm flavor to the herbs that is hard to describe.

For Red Potato Fries, you will need: 
Several pounds of small red potatoes (feel free to adjust the amount, depending on how many people you are serving), cut into wedges
 Sea Salt
Penzeys Herbs de Provence
Vegetable Oil

1. Fill a deep, cast iron skillet with vegetable oil, leaving about an inch of space between the oil and the rim; heat to medium high.

2. When the oil is hot, gently add the potato wedges to the hot oil. (The oil should bubble like crazy when the potatoes are added- that's how you know it's hot enough.) Cook the potatoes until they are golden brown on all sides and you are able to stick a fork through them. 
3. Using tongs, transfer cooked wedges to a heatproof dish (you can add more wedges to the hot oil at this point, or turn the heat off the oil.) 

4. Sprinkle the hot wedges with sea salt; toss the salted wedges in Herbs de Provence. 

Serve hot with organic ketchup. 
(Trust me, organic ketchup is different than you're used to!)
 

Rainbow Chard with Goat Cheese

"Pepper Place" is our local Saturday Farmer's Market (which is The Hungry Baby's favorite place to go - she's gone every Saturday since she was born!) 

While there with my Mom and the Hungry Baby (less than a week after she was born!) I discovered my new favorite go-to veggie: 
RAINBOW CHARD

isn't that just the yummiest thing you've ever seen? It is so easy to forget how beautiful food can be, right out of the ground! 

I bought a large bunch of these greens with the neon stems for $2 and rushed to cook them up the minute we got back home. 
Considering I had never even EATEN chard, much less cooked it, I just winged it and cooked these up like spinach. (FYI: cooked Rainbow Chard tends to have a spinach-y taste)


For Sauteed Rainbow Chard with Goat Cheese you will need: 

1 large bunch fresh rainbow chard, washed
1 "glug" Extra Virgin Olive Oil (about 3 turns around the pan)
1 or 2 cloves of garlic
3 or 4 tablespoons Chevre (fresh goat cheese)
Pinch Sea Salt
Fresh Cracked Pepper

1. Heat a skillet (cast iron works well) with olive oil to medium high

2. Peel and chop your garlic and saute it in the EVOO. 

3. Roughly chop the leaves of the chard (I also tend to chop a few inches of stems and toss those the mix too - rainbow chard is really good for you) and add them to the hot skillet, stirring frequently. (I use tongs to "toss" the leaves a bit)

4. When the chard barely begins to wilt, add about half of the Chevre to the pan. The cheese will melt to a heavy cream - make sure the Chard is evenly coated with this melted cheese. 

5. When the cheese is melted, IMMEDIATELY remove the pan from heat. (Don't just turn the burner off - TAKE THE PAN OFF THE HEAT BECAUSE THE HOT PAN WILL MAKE THE CHARD KEEP COOKING!)

6. After removing the pan from heat, break up the rest of the Chevre and add it to the chard. When the Chard is "just done", serve.